Welcome to Neat Freak McKinney! I’m so happy you stopped by. Let me introduce myself.
I grew up in beautiful Idaho, the oldest of seven children. My mom is also a neat freak. She had to be in order to stay sane in a house with nine people. I learned early on that work always came before play. It was one of the best things my parents ever taught me.
I’ve always loved taking care of, decorating, and organizing my own home. When my daughter left for college in 2006, I was heartbroken. Our life as we knew it was forever changed. In my sadness, my sweet friends all encouraged me to start my own business using my gifts for home organization.
It was then that Neat Freak was born. I had business cards printed and a business plan in place. But God had other plans. My husband was transferred to Denver. We left our beloved Flower Mound and went on a five year journey exploring beautiful Colorado. I shelved my neat freak dreams and went to work in the school district that our son was attending school in. I worked in several differently abled classrooms. What a blessing that was.
In 2012, after grand babies were being born in Texas, we decided to move back. Our family was more important to us than those glorious mountains.
After moving to McKinney, I started teaching in a local preschool, Redeemer Day School, just minutes from my home. I love teaching, I love children, I love that my grandchildren attend the same school, and I love the ministry I have there. But this last year, something inside of me was encouraging me to start Neat Freak up again.
I decided to wait until summer to give it my full attention, and in June 2017, Neat Freak McKinney was born. I woke up one day and said “lets do this”. Social media has drastically changed since 2006, and in just days I had my first clients. I cannot tell you the rewards that have already come my way in just this short time.
I can’t wait for the rest of the story……
Love, Lisa
PS We now have six grand babies, with another on the way! God is Good!
Ok friends, grab a cup of your favorite something and pull up a seat, this post is a big ole Spring Cleaning Panty Extravaganza!
I love organizing pantries, and get asked all the time what my favorite pantry organizers are. Since this time of year brings out all the spring cleaning vibes I thought I would share some of my favorites with you!
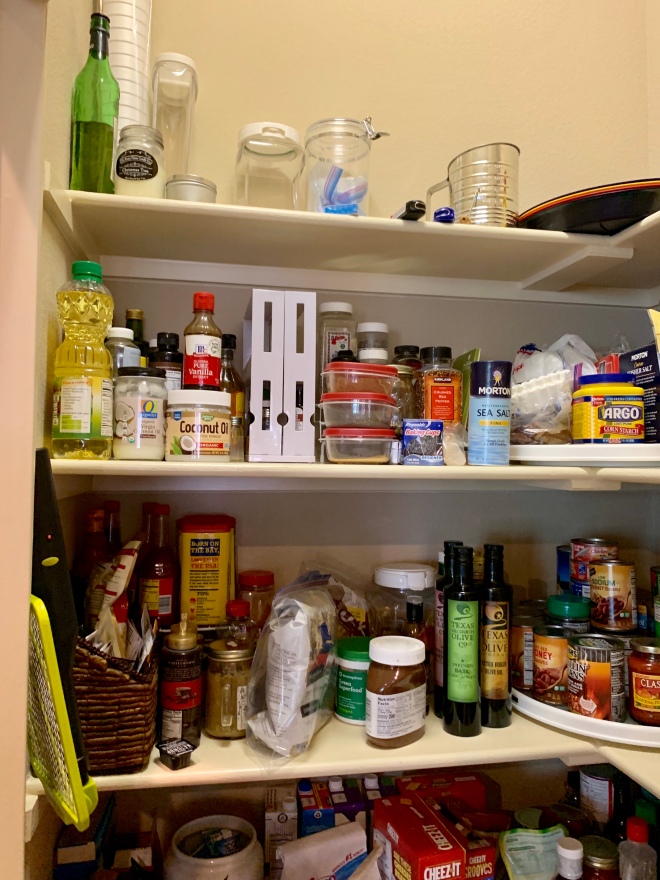
First take everything out.
Yes, you heard me correctly, take it all out. This enables you to touch and see everything. Even #proorganizers find things lurking in the back of our spaces. While you are taking it out, sort like items with like items. This is also the best time to check expiration dates. Once everything is sorted and purged, wipe down your shelves, sweep the floor, then put it all back in using zones.
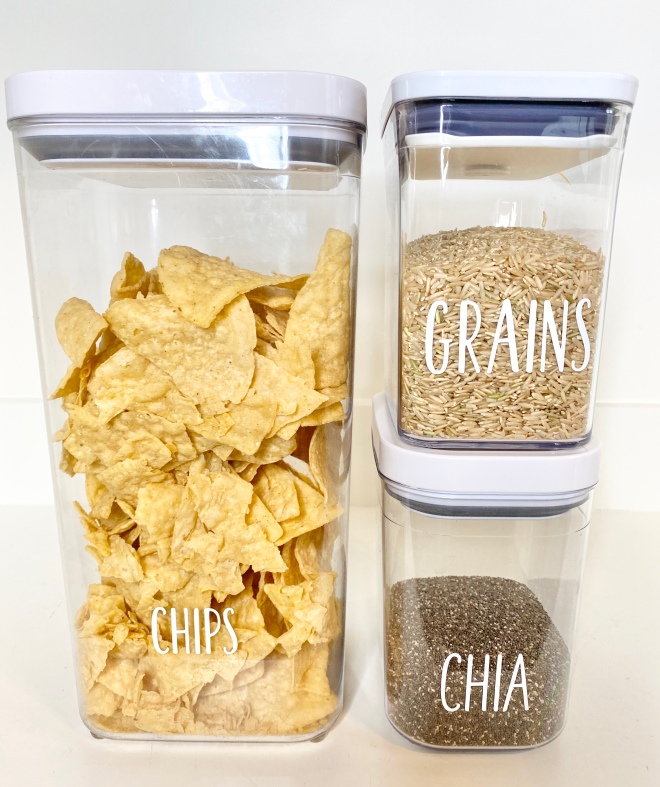
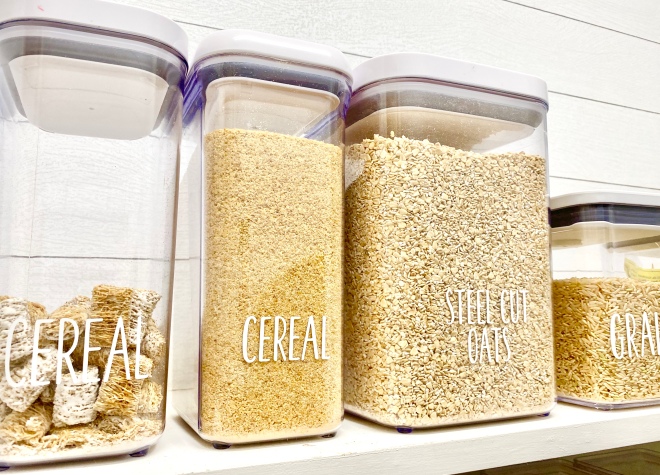
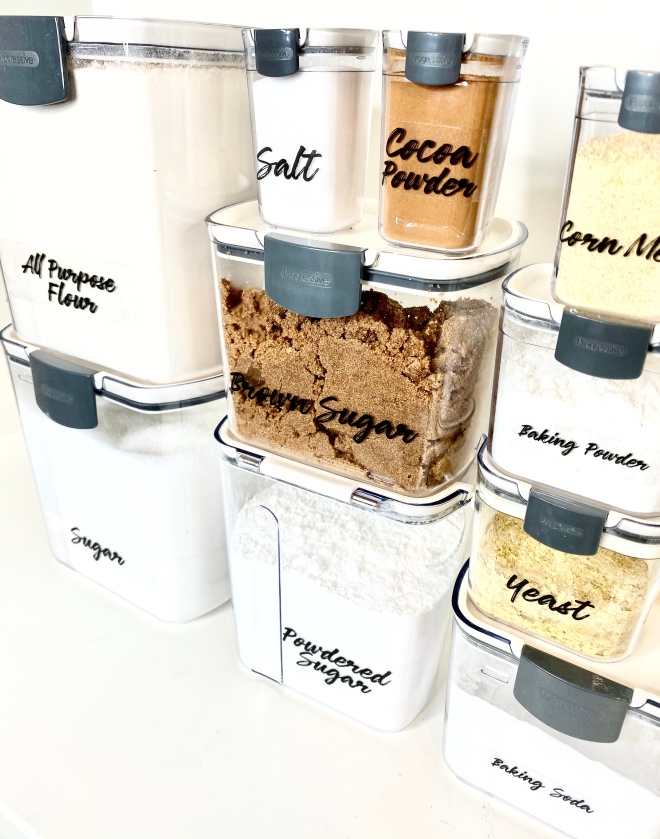
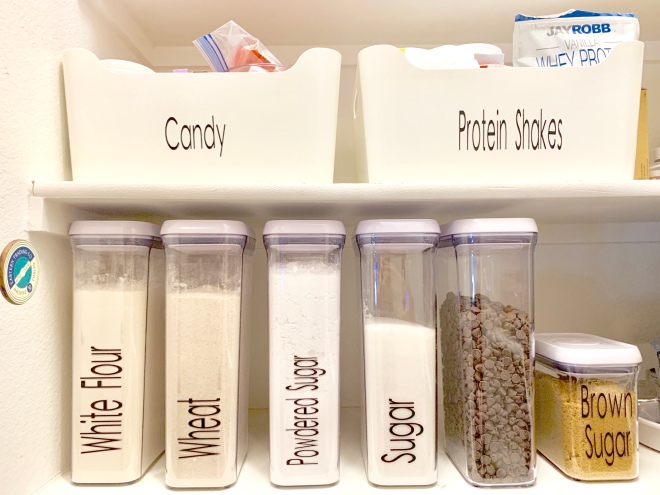
Next, let’s talk about decanting
The reason I like to decant is that you can easily see what you have and how much of it you have left, plus, it keeps your food fresher longer. I decant all my baking items as well as all my dry goods. Let me show you my favorites.
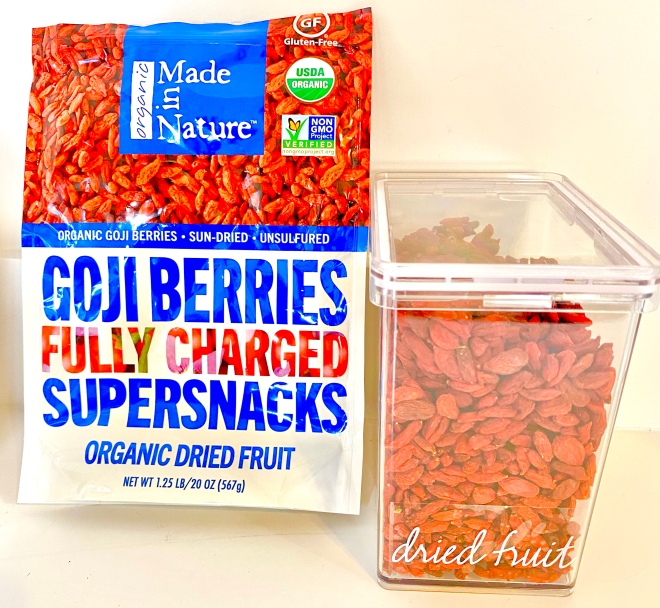
I get asked a lot “How do I know what size container to buy?”. It’s just simple math. All food packages have the contents listed, just convert ounces to quarts and you’ll find the right size.
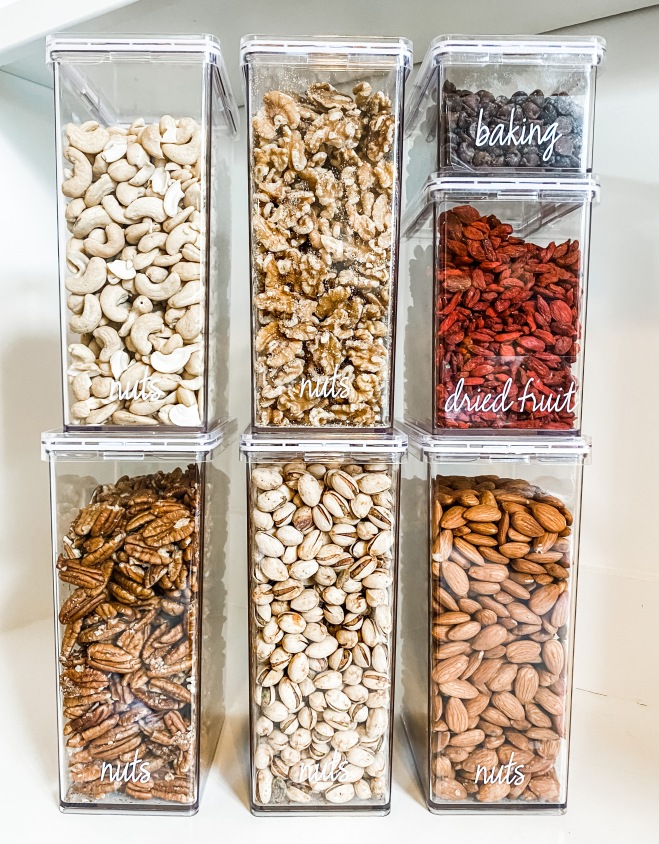
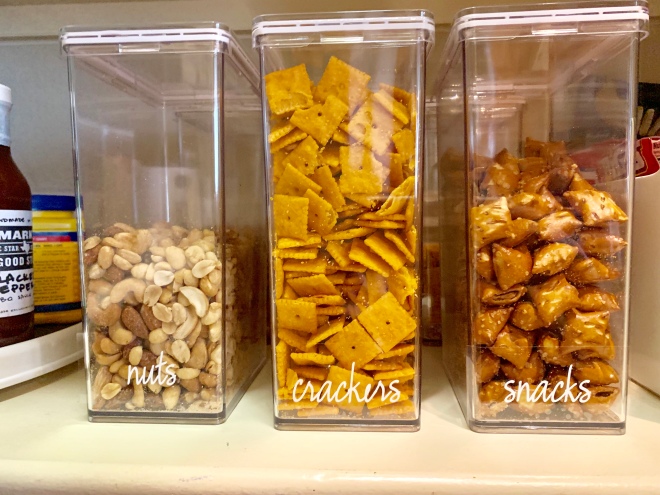
Here, I decanted Costco sized snacks in the large T.H.E. Pantry Canisters. The 32 oz bag of cashews fit perfectly, while the 48 ounce bag of pistachios fits all but a small bowl’s worth, which made its way straight to the table for snacking.
Bonus: they all stack nicely with each other in my pantry! Find the labels I used here.
That’s a lot of nuts!
Zones: Baking
Here are some great ideas for all your baking ingredients. I love the ProKeeper 10 piece baking set. Mix and match the spices, and ingredients you use most.
The smaller containers come with a removable shaker screen which allows you to pour or shake ingredients, and includes a leveler for measuring spoons.
The ProKeeper brown sugar canister comes with a terra-cotta disk that you can soak in water before inserting into its holder, that helps keep the brown sugar soft.
Decant whatever you use the most for baking, and group together.
Now that we have cleaned out the pantry, sorted, purged, and decanted. It’s time to put it all back in. My normal zones are: breakfast, lunch, dinner, snacks, eat first, baking, paper goods, and back stock. Here are my favorite containers to use.
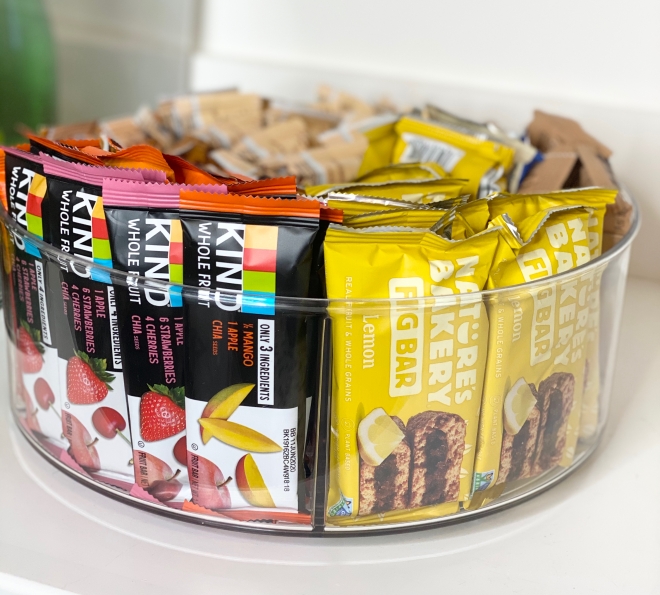
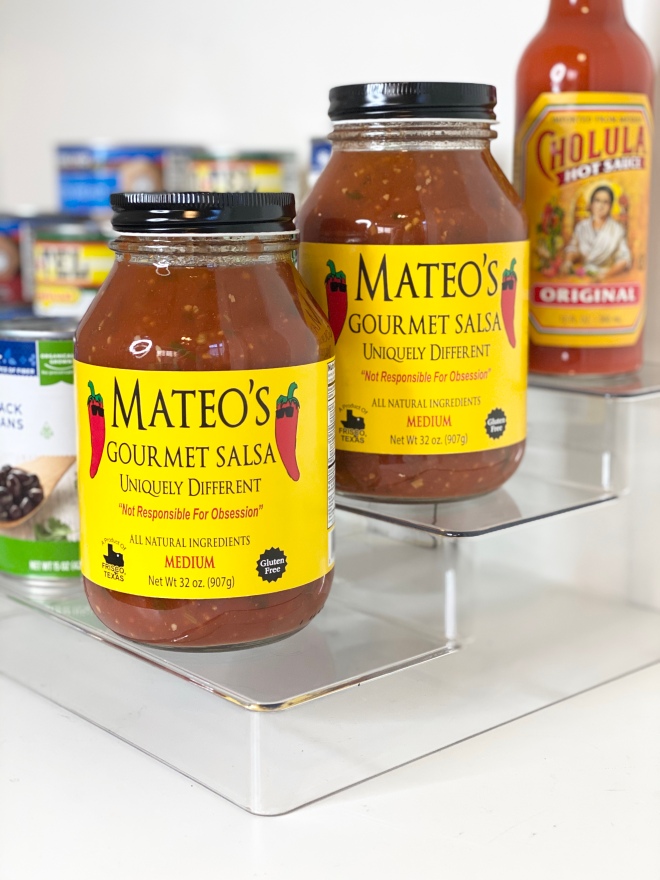
And for pantry corners, I always suggest turntables to take advantage of all the usable space.
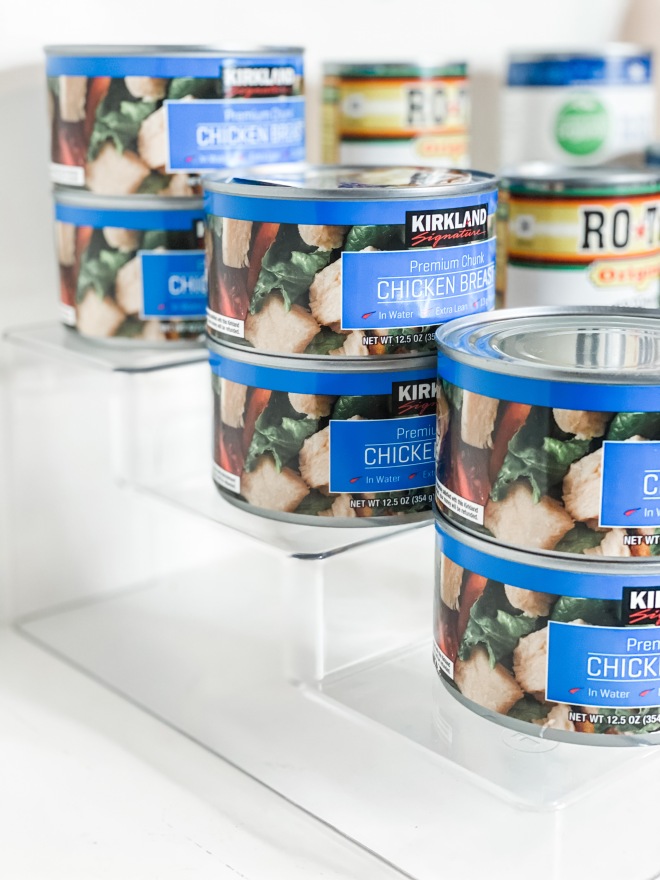
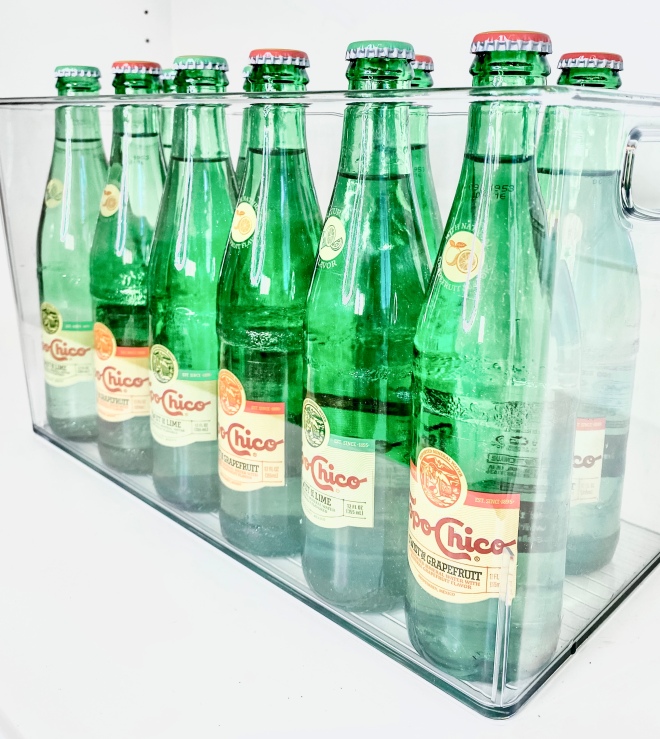
Some of my other favorite pantry staples include acrylic bins.
Acrylic bins are perfect for keeping any type of item contained. I use them for everything even in my my fridge and freezer.
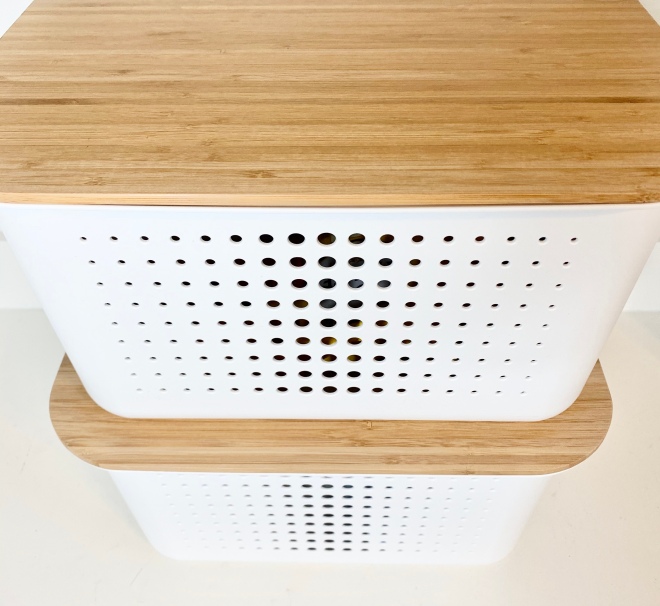
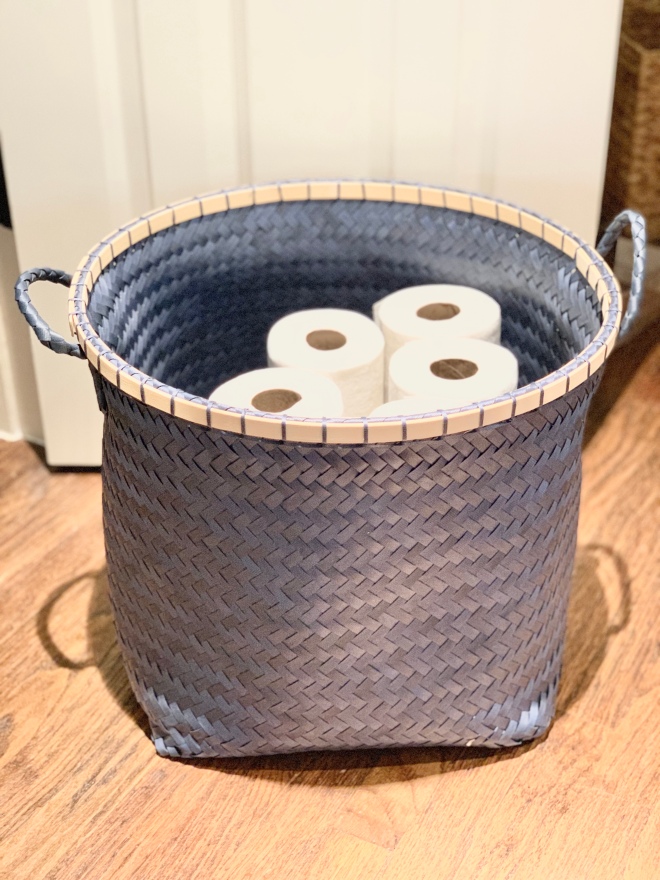
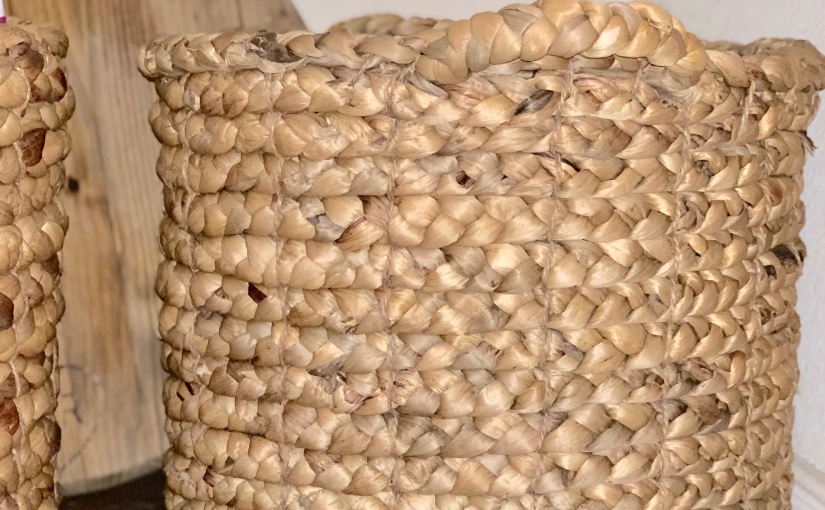
And last but not least, I always add a floor basket to store paper towels, lunch kits, paper products, and bulk items.
So there you have it, all my pantry favorites. If you want to see more of my pantry spaces follow me on Instagram or Facebook. I also share inspirational ideas on Pinterest.
Right now is a great time to organize your pantry too! The KITCHEN SALE is going on now thru April 5th at The Container Store.
If you live in the DFW area, I’d love to come and help you. If not, I offer virtual organizing sessions via FaceTime! To schedule, send me an email.
Ready to help you today,
Lisa
{this post was sponsored by The Container Store, but all ideas and content are mine}
Today, I’m excited to welcome my first guest blogger, Nick Brough from ModoBath.com. Having an organized bathroom can make all the difference in your daily routine. Whether you are building a new home, remodeling your current home, or want some new inspiration, Nick has some great ideas.
The Importance of Creative Bathroom Organization
Organization can often be difficult to accomplish in your bathroom if you don’t know where to start. There are many facets of a bathroom in terms of both design and layout, so it is important to understand how your bathroom functions and how it can be improved on. A combination of both creativity and organization will help to improve the overall quality of your bathroom, while simultaneously increasing the level of comfort. This guide will highlight some of the best ways to get creative with organization in your bathroom.
Step 1: Use Baskets to Organize in an Elegant Way
This can be one of the most beautiful and easy ways to effectively organize your bathroom space. Baskets can be used in essentially any area of your bathroom, making them one of the most versatile methods of organization. For example, if you have extra countertop space on your vanity, try using a basket to store items that are just laying around. These items could range from hand towels to soaps, to daily lotions and medicine. Keeping them contained in a basket helps create a less cluttered look. Baskets can be hung from the ceiling, mounted on the wall or placed on the floor. Depending on the layout of your bathroom, this is perfect for allowing your creativity to flow. It is also important to note that you should always have both a laundry basket and a waste basket in your bathroom to ensure that clutter is limited and laundry is always where it should be. In addition to that, baskets come in several different sizes, shapes, materials and textures, giving you essentially an infinite amount of possibilities when searching for the perfect storage solution for your bathroom.
Step 2: Use Drawer Dividers in your Vanities & Cabinets
This one might seem obvious, but it is often overlooked. If your drawers are filled with loose items, this is definitely something to consider. Many people tend to organize their toiletries by drawer, but that’s usually the extent of it. Let’s say you have a vanity that has two levels of drawers, one drawer above the other. Your top drawer should have your most important or most used items, separated by the appropriate number of dividers for easy access to each item. These common items can include dental products, hairbrushes, makeup or other similar items that are used daily. In the drawer underneath, keep your less used items. This can include anything from toilet paper to cleaning supplies. Of course, this will vary depending on how big your drawers are. You may not need drawer dividers for your bigger items, but smaller items that can be easily lost will require them for optimal organization.
If you are purchasing a new vanity, you should consider vanities that already have dividers included with them such as the Ambra 60 at Modo Bath.
Step 3: Install Corner Bathroom Shelves
This is another overlooked aspect to organization that can probably be one of the most effective. Corners are usually empty in a bathroom design, especially up towards eye level. This is the perfect opportunity to include a number of small shelves to hold some of your items that you might need more access to. For example, if your toilet is in the corner of your bathroom, incorporate 2-3 shelves, one on top of the other, to store items such as small towels, toilet paper, soaps or any other items you may want easy access to in that area. You can also use these shelves as decorative pieces as well, by placing some kind of plant life on them for a natural accent to your bathroom.
Step 4: Vanity Accessories
The incorporation of vanity accessories is important for any bathroom when it comes to organization. One of the best aspects of vanity accessories is the amount of creativity you can express when going through the process of incorporating them. For starters, include a toothbrush holder. There are so many different possibilities. You can have a cup-like toothbrush holder, a wall mounted toothbrush holder or you can even make your own. For example, try a mason jar or even a handmade piece of pottery to add a personal flare to your vanity. Of course this isn’t limited to toothbrush holders. Explore your options and decide which accessories you want to experiment with. It is not uncommon to include DIY accessories, in fact, it should be encouraged. The more creative you can get with any given aspect of your bathroom, the more comfortable and happy you will feel on a daily basis.
Step 5: Use Your Doors
The doors in your bathroom can be used for much more than their primary purpose, and organization is a big one. One of the most effective ways to do so is to include shelves on the back of doors, or something like this on the inside of cabinet doors . This will not only create additional storage space, but it will give you any additional compartments to store specific items. This is convenient for any items you may not need all of the time, but still need easy access too. This could be anything from cleaning supplies to medicine.
In Conclusion…
It is important to understand that creativity is essential in any bathroom design in order to fully appreciate and enjoy your bathroom experiences. A personal touch in tandem with beautiful fixtures and creative organizational accessories goes a long way when it comes to relaxing in a comfortable environment. In the end, you will be enjoying a comfortable and well thought out bathroom.
______________
Thank you Nick for sharing all of your fun ideas and tips with us. For more bathroom ideas check out ModoBath.com, they have some amazing inspirational pieces!
When was the last time you organized or updated your bathroom? Does is need some help? If you live in the DFW area, I’m an email away. Don’t live near me? Schedule a virtual organizing session here.
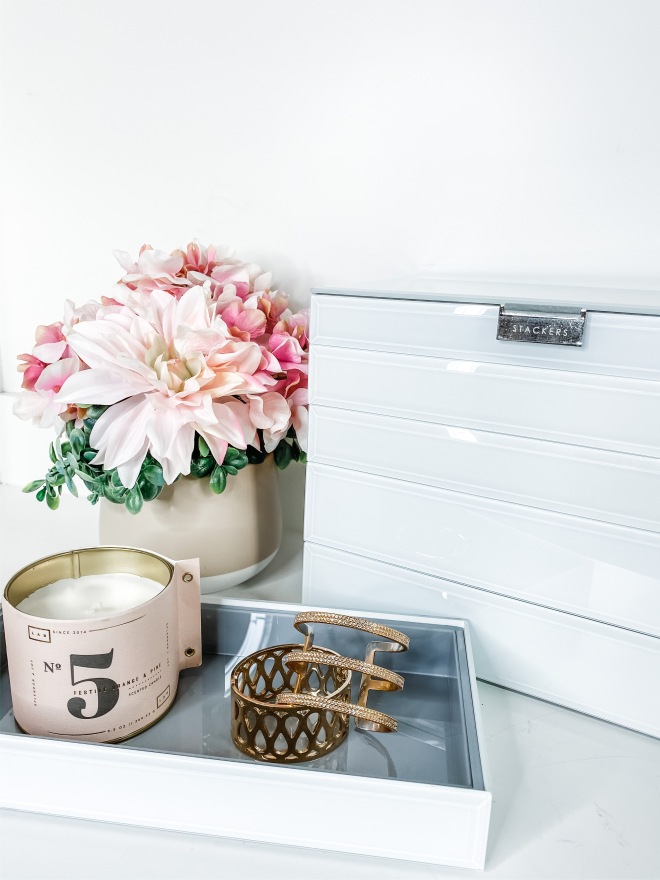
February 14th is the day that we set aside to express how much we love someone. It usually includes candy, flowers, romantic dinners and in my case, jewelry.
My husband has spoiled me rotten over the years and I have some very special pieces to pass down to my daughters and granddaughters someday. Want to see how I organize it?
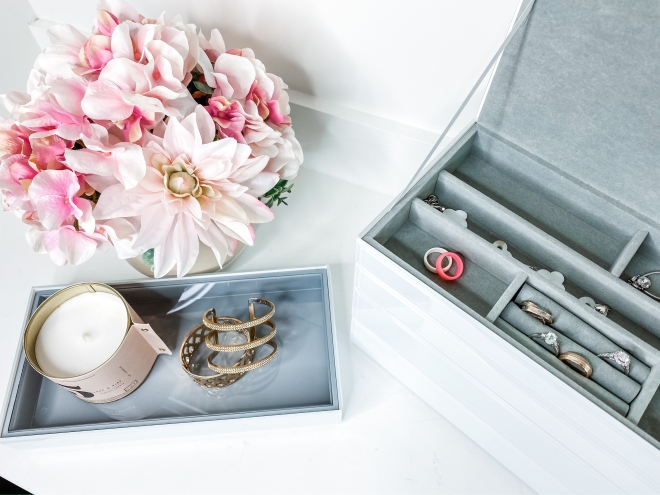
How To Organize Jewelry
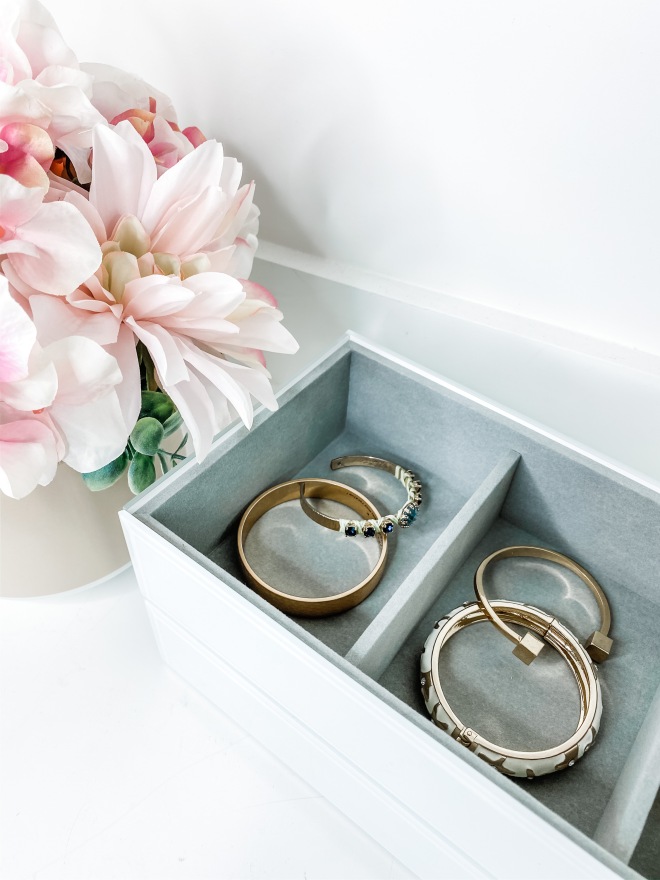
Recently, I upgraded my jewelry organization. I sorted it all out, donated what I didn’t wear or love anymore, categorized it, and put it all back together here. I treated my jewelry collection just like I would a Pantry Makeover or Custom Master Closet.
It’s perfect because I like to sort and organize like with like. You can easily see how much you have, and where to find it all together. Here I organized gold bracelets together in the three section stacker.
Well can you believe 2020 is here? I cannot! Time is flying by so quickly! That meme going around that says 1980 was 20 years ago made me stop and say, right?? LOL.
Do You Make New Year’s Goals?
I always used to do the same ole same ole until I realized that “getting healthy” should be a year round goal, not just a once a year goal. So if one of your New Year, New Goals is to get organized, I can help you make that a year round goal as well!
Where do I start?
Where do I start is a question I get a lot! My answer is simple. Start somewhere. Start small. Create small victories so you feel accomplished. Small victories add up to bigger victories and pretty soon you’ve done it!
This year I decided to take my own advice and start small. I have several closets in my home that don’t have a “set purpose”. We are empty nesters now and that created several empty bedrooms and closets. I want those closets to be on my New Year, New Goals list.
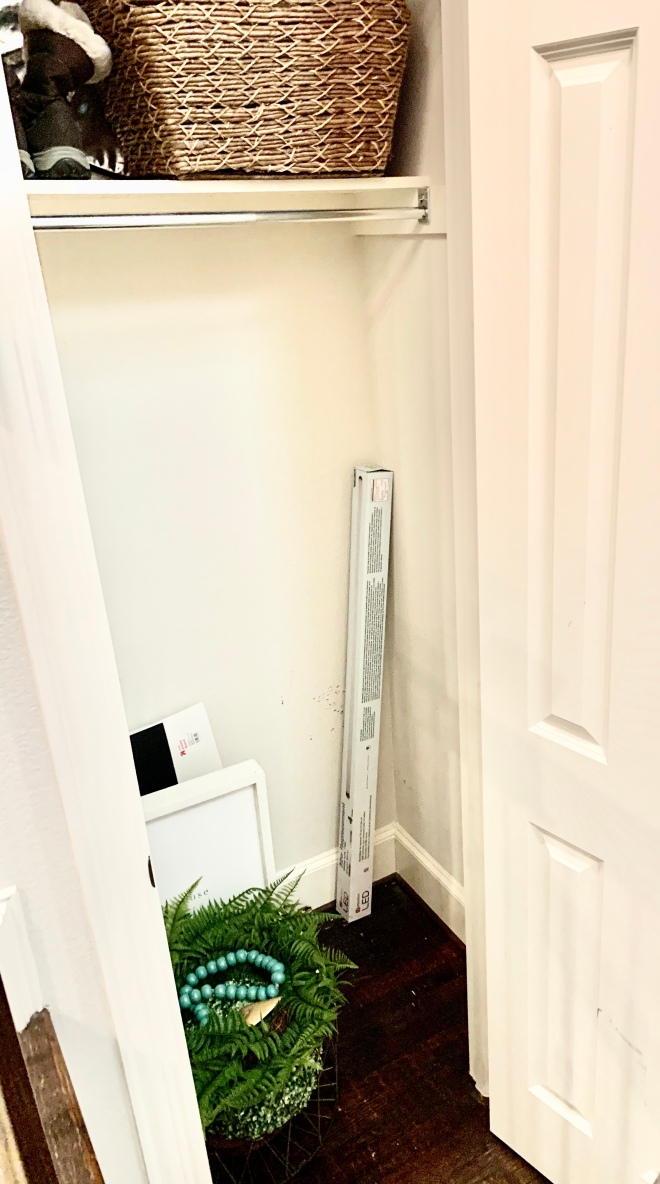
One closet in particular is the one right outside my office. I am blessed to have two coat closets in this house plan. We use one for coats, and the other one was being used for all our winter gear. When we moved here from Colorado in 2012, we had all the outdoor snow gear, so I designated that closet as the “winter” closet. Fast forward to being back in Texas a while made me realize we hadn’t used that gear in years. So I sold most of it on my neighborhood Facebook market place, and all that was left was this….
Closet Before
Two pairs of boots, some old videos, extra light bulbs, and off season decor storage during Christmas!
First Step: Make a plan for your space.
This closet is my first project on my New Year, New Goals list. I decided to better utilize this closet for all my Neat Freak McKinney back stock. I like to keep my favorite organizing products on hand, and my office and car were overflowing. Enter the extra coat closet!
Why I chose an Elfa System:
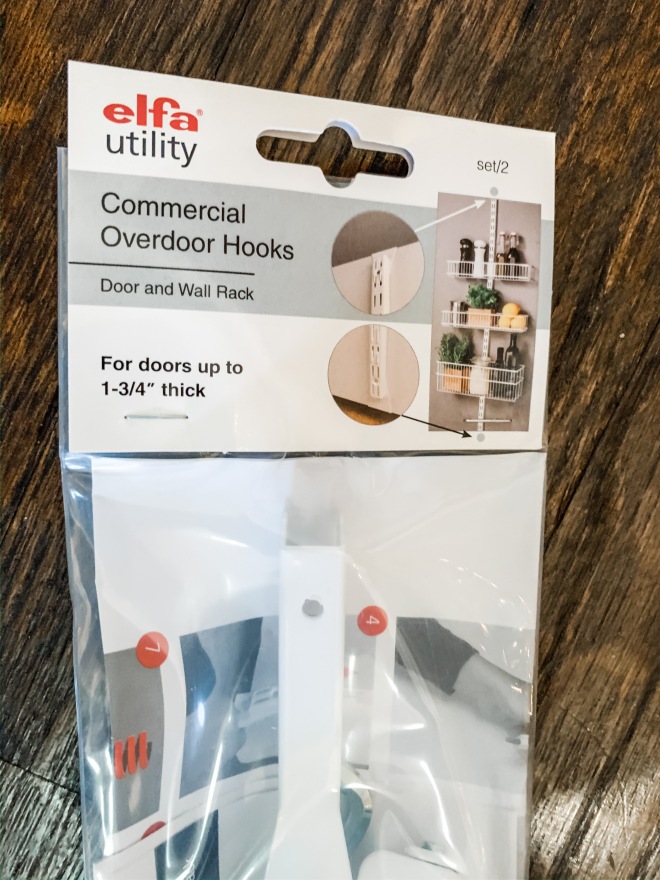
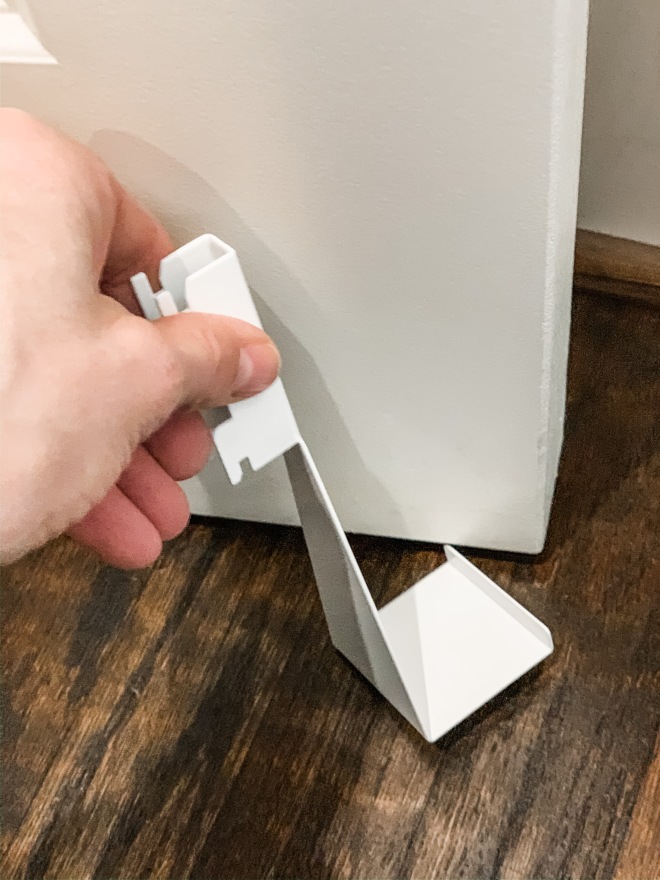
I decided to take advantage of the Elfa Sale and put in an over the door system! It’s so easy to install! Here are the parts I started with:
Elfa Over The Door System
The first thing you need to do is measure your door. We have 8 foot doors in our home and this length fits my doors perfectly! They come ready made in two sizes but can be cut to fit!
Next, I assembled all the parts on the door. No holes or drilling required. It might have been easier with another set of hands, but I can do these in my sleep by now and don’t need any extra help, other than a ladder.
Measure Before You Buy
I also needed the commercial sized over the door hook. So be sure you measure the width of your door too!
The Kit Comes With Everything You Need To Install
Make Sure It’s Level
Custom Fit To Every Need
It literally took me five minutes to install. It comes with an Allen wrench to tighten and secure the top bracket. It’s so easy!
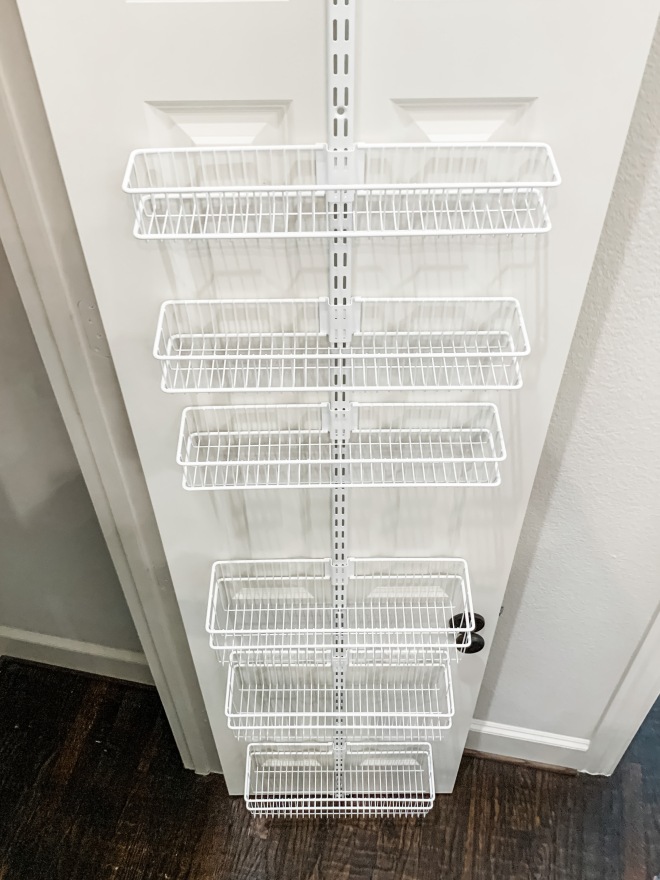
Next, I added in all the back stock I had in my office and car. This system is great because you can change the height of each basket to fit your needs.
My Neat Freak McKinney Back Stock
Baskets Hold So Much
All Ready To Help You Get Organized
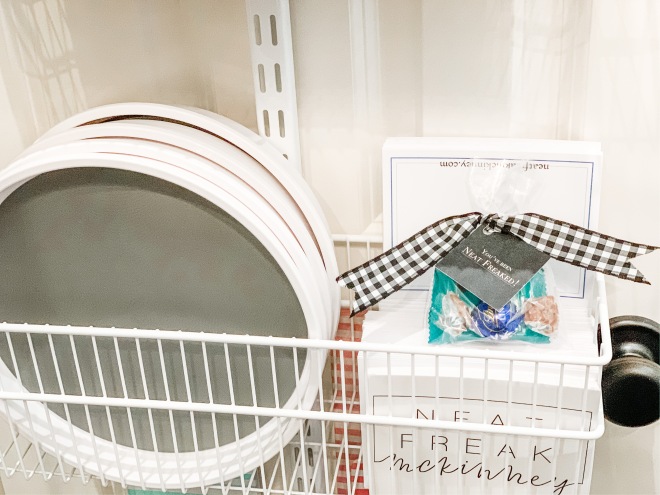
I added this utility board to hang decor from. You can customize it with all different types of hooks! They even have clear boxes that clip on to hold tape, ribbon, safety pins, anything you want! This system is so versatile and that’s why I love it. All my clients have different needs and I can custom fit for any space!
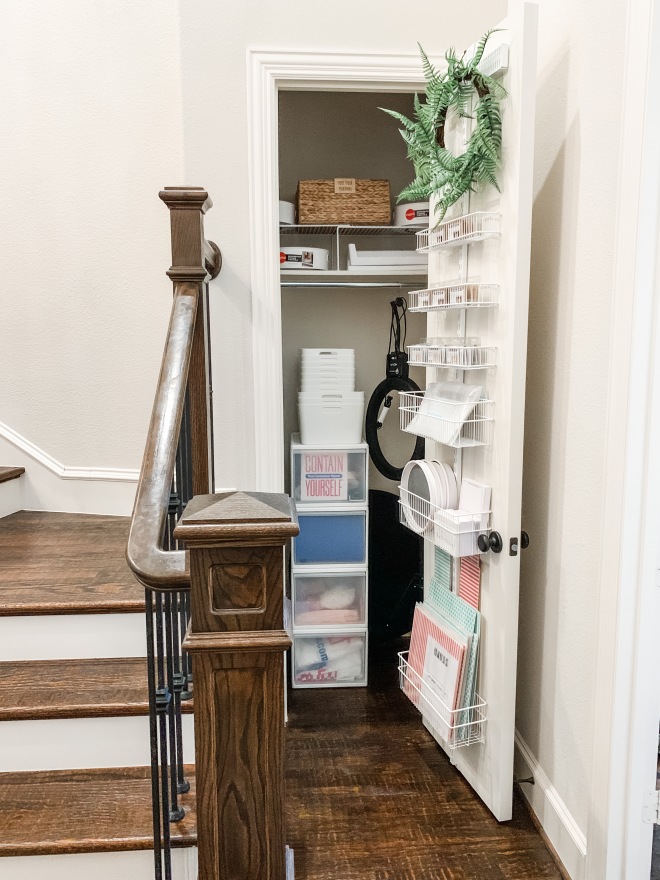
The rest of the space I am using for storage. I incorporated my stacking drawers that hold so much, my light ring, tripod, garment rack, and extra tall light bulbs! Everything I need to Neat Freak is all right there!
Neat Freak McKinney Closet
My Favorite Organizing Tools
So Close To My Office
I am so excited about this! Organizing makes me happy! This closet now has one purpose and is steps away from my office!
Right now everything Elfa is 30% off! 30% off all products and 30% off installation too! I can help you design the closet of your dreams. Whether it be a storage closet or your Master Closet, I can help you. Email me if you’re interested! I can help you locally or virtually!
What are your New Year, New Goals going to be?
New Year, New Goals are my specialty! Follow me here on Instagram, or here on FaceBook, or here on Pinterest for more inspiration! I’d love to hear from you!
Ready to help you today,
Lisa
{this post has been partially sponsored by The Container Store. All opinions and pictures are mine}
We’ve all seen the holiday movies where the dad is forever wrestling with tangled tree lights right?…Clark Griswolds everywhere can rejoice… I’m here to help you organize your holiday decor the less stressful way!
Let’s Organize Your Holiday Decor
Before I decorate anything, I take inventory of the decorations I already have. The first thing I do is get down all my decor totes from the garage. I keep my tree, ornaments, garland, wreaths, and lights on a shelf unit that is easy to get to. I get everything out and decide if I still love it and want to use it again. If I don’t, I donate or sell it! #useitorloseit is my motto.
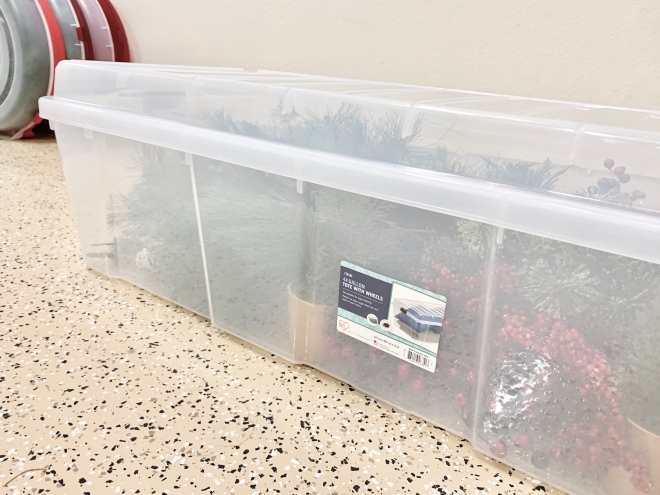
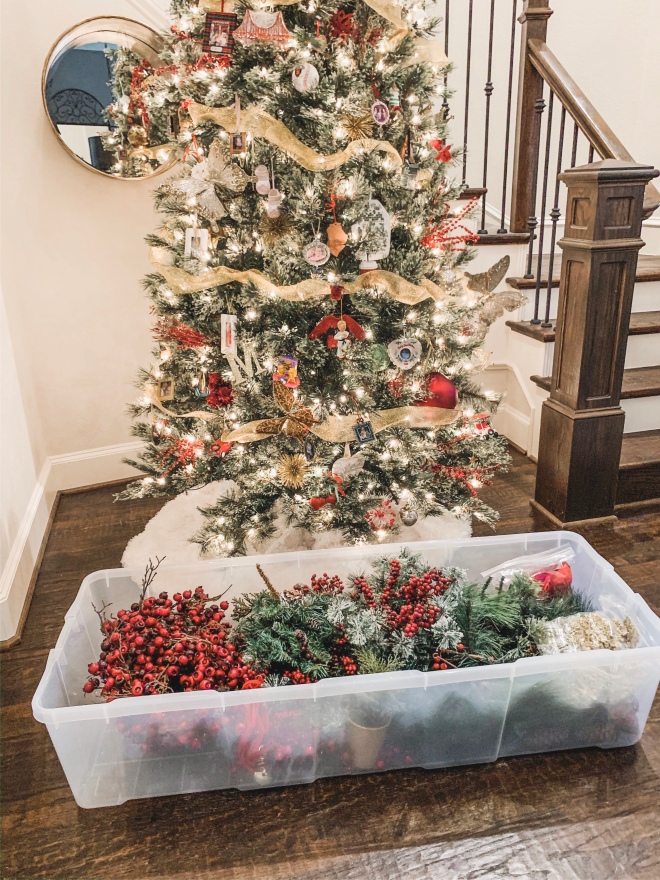
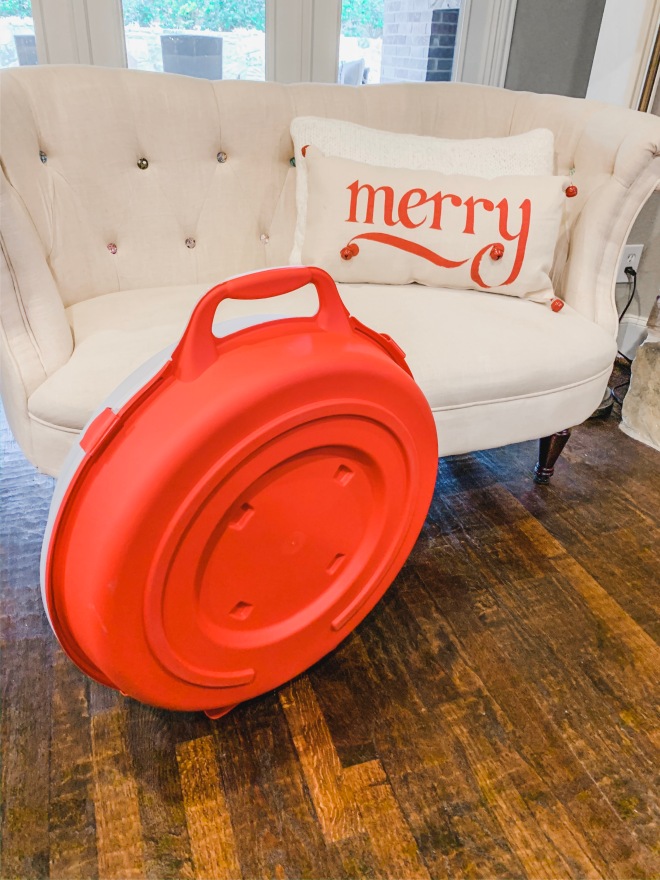
I love keeping all the larger unbreakable Christmas accessories in this one big tote on wheels. It makes bringing it into the house so easy. It can easily be rolled under a bed too. It holds so much that I am able to keep all of my tree picks, garlands, berry wreaths, and smaller faux trees in one spot. When not in use, it stacks neatly on the top shelf in my garage-so easy!
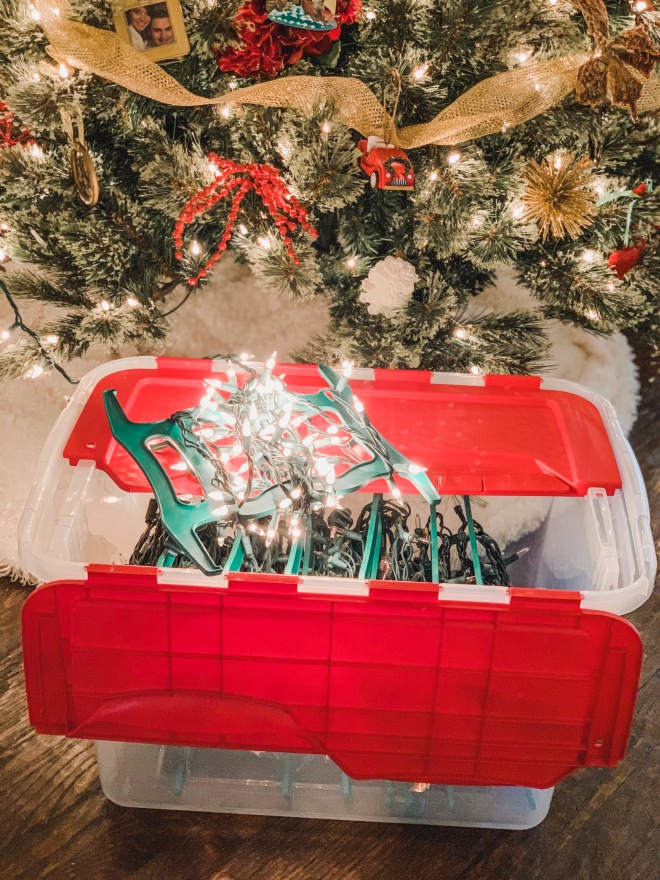
Lights
Do you have a pre-lit tree or do you string your own? Even though I have a pre-lit tree I still string my own wreaths, garlands and outdoor tree trunks. I keep all the lights tangle free and ready to go with these light wrap storage boxes. It’s also easy to find a string of lights if I need them at any other time of the year. Keeping like with like makes it easy on everyone.
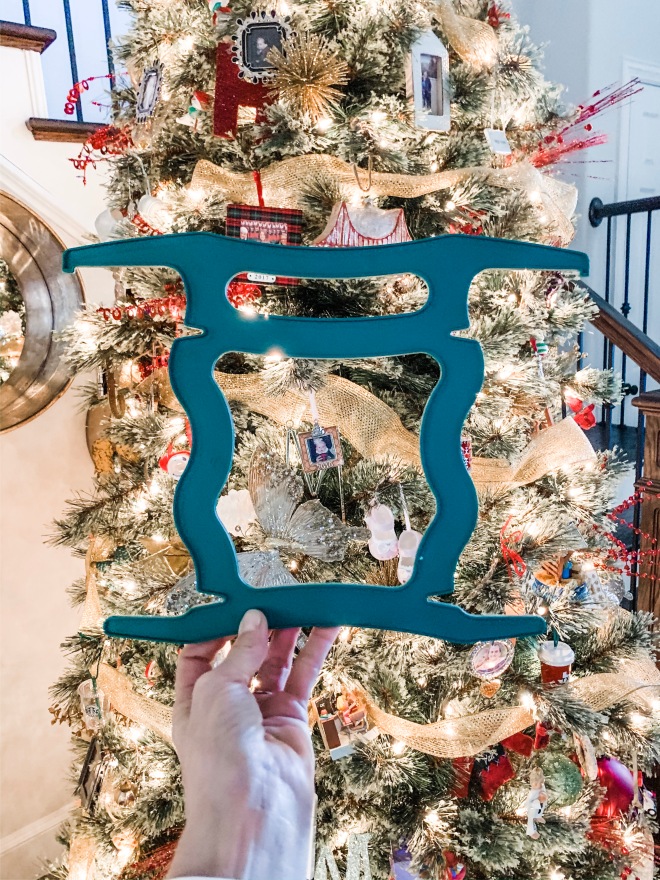
The lights wrap around these organizers keeping them untangled. The notches hold the plug ends in place and then they all stack nicely in these storage boxes. The attached lids on the totes are perfect for stacking one on top of the other.
I used to store my wreaths in plastic trash sacks in the garage until I found these wreath storage boxes. I have three of them, and rotate my front door wreaths in and out as the holidays come around. They stand up right and fit perfectly on the garage shelf. They can also be hung up on the wall. I love that they keep my wreaths completely dust free and safe from critters.
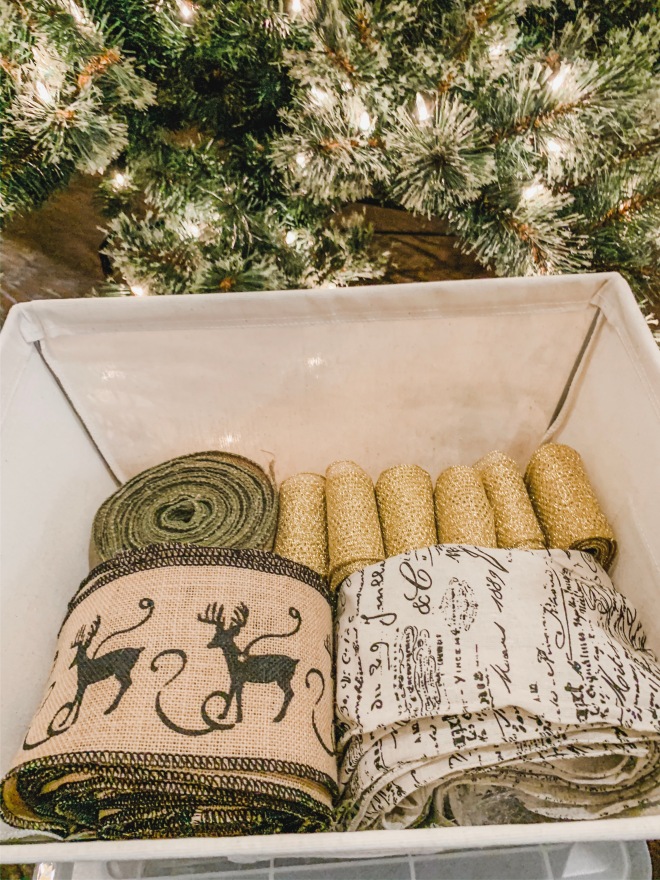
Ribbons & Nativity
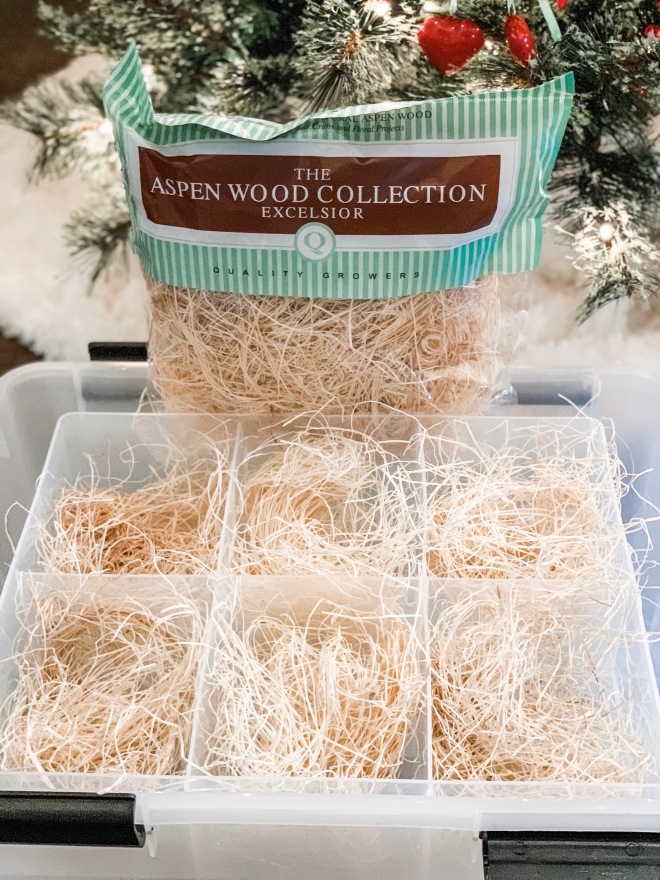
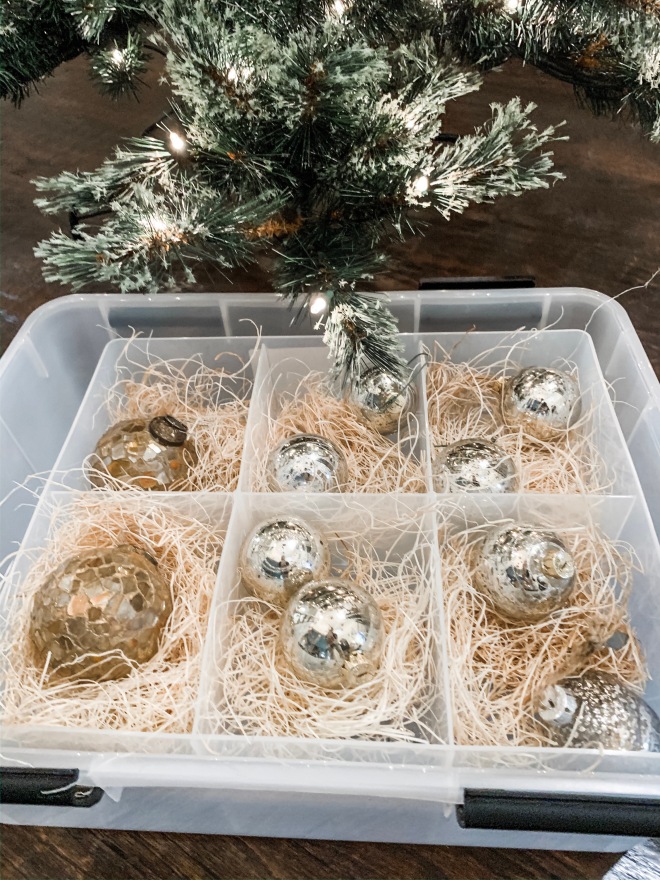
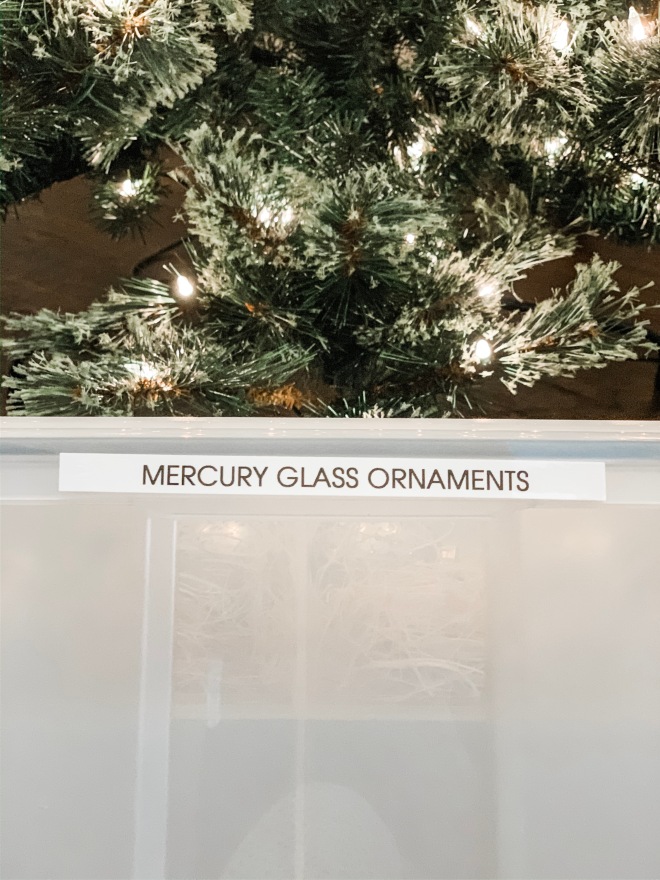
There are a few things I like to keep in the house vs. the garage. I love using these open canvas bins to store my ribbon collection and my breakable nativity scene. They are similar to my favorite farmhouse bins that I use everywhere. I keep these on the top shelf of my linen closet. The built in label pocket makes it easy to see exactly what’s in each bin.
Having all our holiday decorations organized in one location helps keep my stress level down. I know exactly where everything is stored, and all the labeled bins help me find exactly what I need. I have a spot for everything. It makes setting up and putting away so easy! Also, by purging unwanted and unused decor pieces each year, I end up using everything I have and love. Organize your holiday decor the less stressful way!
How do you organize your holiday decor?
Need help? I’m an email away. Want to follow all my organizing tips and tricks? Follow me here on Instagram, or here on Facebook. I also have a Pinterest and Like To Know It page. I’d love to hear from you! Happy decorating!
From my home to yours, Merry Christmas and Happy Holidays,
Lisa
{This post is sponsored by The Container Store, but all thoughts and ideas are mine.}
“Christmas is coming” my husband always says! When our kids were younger, whenever they would say they liked or wanted something he would say “Christmas is coming!” …even if it was February 1st lol. But guess what? Christmas really is coming….and soon!
Are you ready for the holidays?
I know every year it comes around faster than we realize. We are just getting our pool toys put away and BAM, we turn around and it’s Christmas.
I’ve always been a gift bag person, but either way you can find what you need at The Container Store. They have a beautiful selection of gift bags and tissue paper to choose from, as well as gift tags! I love going in there and seeing the beautiful displays of holiday wrapping ideas. They make it easy to find all the coordinating designs for your color scheme.
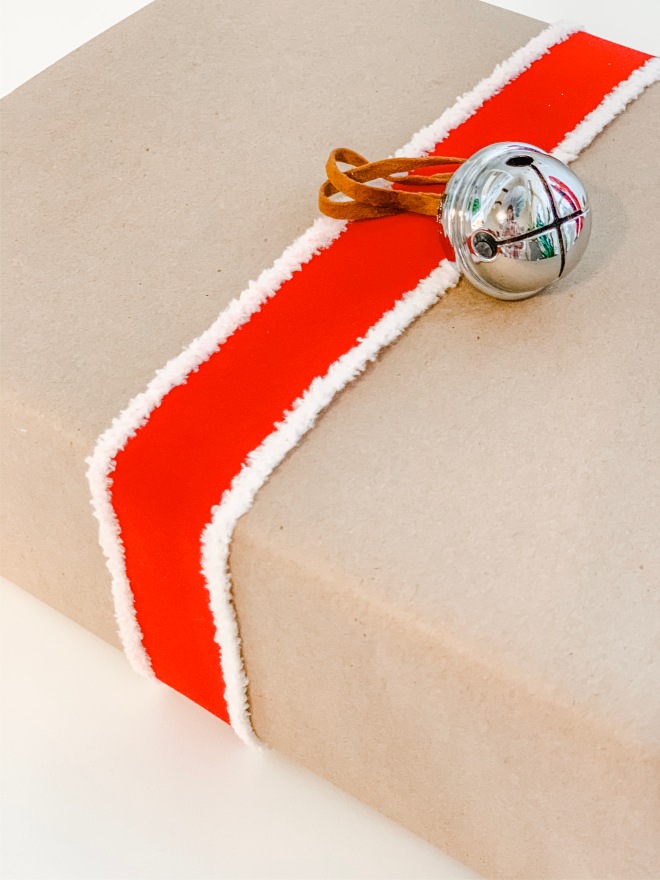
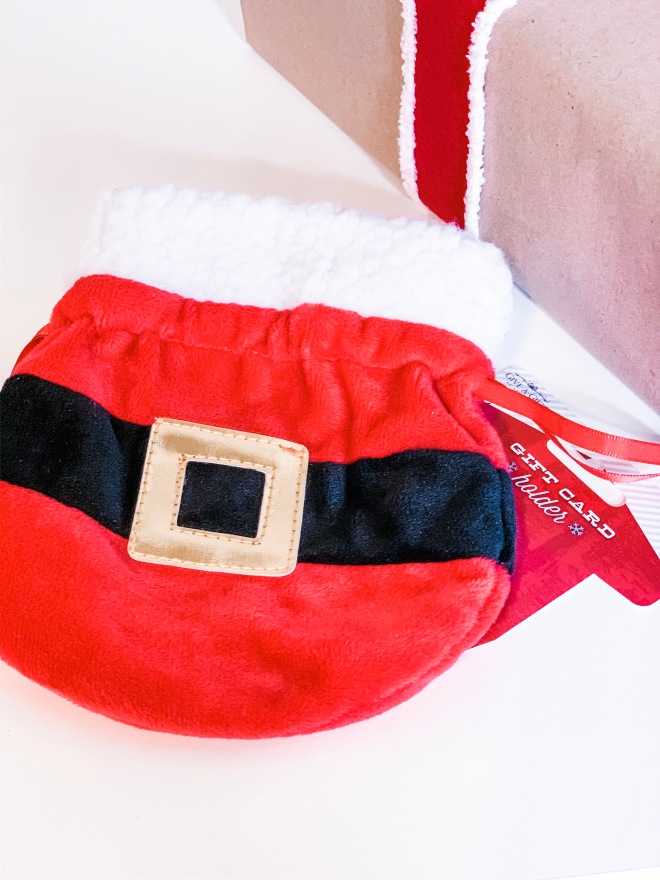
Can we talk about ribbon for a minute? I’m so in love with this pretty velvet Santa ribbon! I also grabbed a couple of rolls of this white satin ribbon that’s trimmed with red pom poms! This year my theme is going to be this craft paper with the ribbons I mentioned above. Here’s a sneak peek!
Brown paper packages tied up with ….ribbon!
These are a few of my favorite things!
It’s classic and fun and goes with my natural wood colored theme, with just a fun touch of red! I also love these reusable jute gift bags! You can use them over and over again. Add fun tissue paper and you’re all set!
How do you organize your gift wrap?
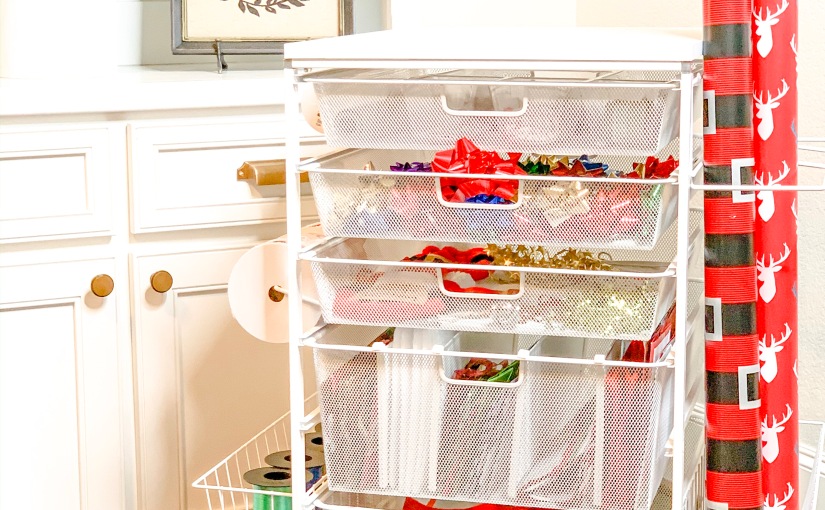
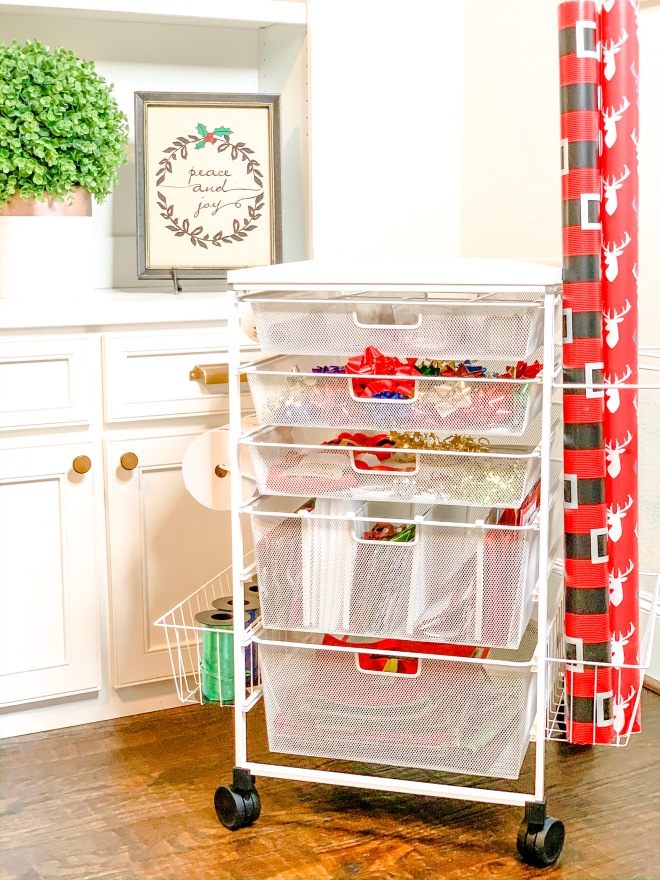
This year Christmas came early for me in the form of this AMAZING ELFA gift wrap cart! For real’s, my organizing dream come true! The best part is that you can roll it from room to room. Kids hanging out in the den? No problem, just roll it into your bedroom. Here’s mine all decked out and ready to go!
Elfa Gift Wrap Cart
So versatile!
It holds everything you need! All in one place.
It even has a ribbon arm!
Can we talk about this for a minute? Five drawers, a ribbon dispenser, wrapping paper organizer, hard top surface for wrapping gifts….AND it’s on wheels?? And look at the top drawer! It has a clear divided tray to hold tape, gift tags, pens, whatever you want! You guys, I haven’t been this excited for something since my husband bought me the vacuum of my dreams LOL!
Is Christmas coming early for you too?
What’s on your Christmas list? Want to get organized? Ask for one of these, or for a gift card from The Container Store! Want the gift of organization to come to you? I offer holiday gift cards too!! Organization is one gift you won’t want to return!
I love these Santa bag gift card holders!
Christmas is coming sweet friends, are you ready?
I’m here to help you today,
Lisa
{P.S. You can follow me on social media by clicking the links below}
*This post was sponsored by The Container Store. I am proud to be a Brand Ambassador for them. I love and use all the products I endorse; and I love sharing them with you! Happy Holidays!
Whenever I show before and afters of pantries on my Instagram feed they get the most comments and likes. I think it’s because it gives people ideas, hope, and inspiration to know that a crazy space can become an organized space.
Want to see some of my favorite before & after pantries? Let me show you…
Before & After: Pantry #1
Before: My client had tried to create order by using small clear bins, however the bins were too small for the amount she was tying to contain, and because they were see through, the bins created visual clutter. The other issue was that she had great Oxo brand containers , but they were spread throughout the pantry. They make a cleaner visual impact when they are all together. Storing holiday items used once a year also took up space that could be used for everyday items.
After: By using larger baskets and bins, as well as creating zones, I was able to bring order to every shelf. Storing like with like, she now knows exactly how much of every item she has, and it’s easy to find. These large lazy susan’s are my favorite for pantry corners and top shelves. You can twirl the lazy susan and bring what you want to the front with ease, no step stool needed. Lazy susan’s in corners use all the available space so nothing gets lost in the back.
I always try and use large floor baskets to hold items like paper towels, lunch boxes, large amounts of snacks, etc. Adding labels also helps everyone in the house know exactly where everything is, and where it goes when you’re unloading groceries.
The holiday items now live in an unused cupboard up high.
Before & After: Pantry #2
Before: No rhyme or reason to where items are put. They have no idea how much they have of anything, or where it is. This makes for double purchases as well as waste when lost and unused items become expired. There was a lot of wasted space in here as well. Let me show you how I solved these problems.
After: I created zones; baking, breakfast, lunch, dinner, baby food, canned goods etc. Keeping like with like they will know exactly how much they have. I also put all the Oxo containers together, again creating visually clean lines. Lazy susan’s hold bottles of vinegars and oils, and bamboo bin clips tell you exactly what is in each basket. In the blue floor baskets I stored lunch boxes and reusable bags. The sides of the pantry are lined with bins too, and the dog food was relocated there. Every inch of the pantry is being used to its potential now.
Before & After: Pantry #3
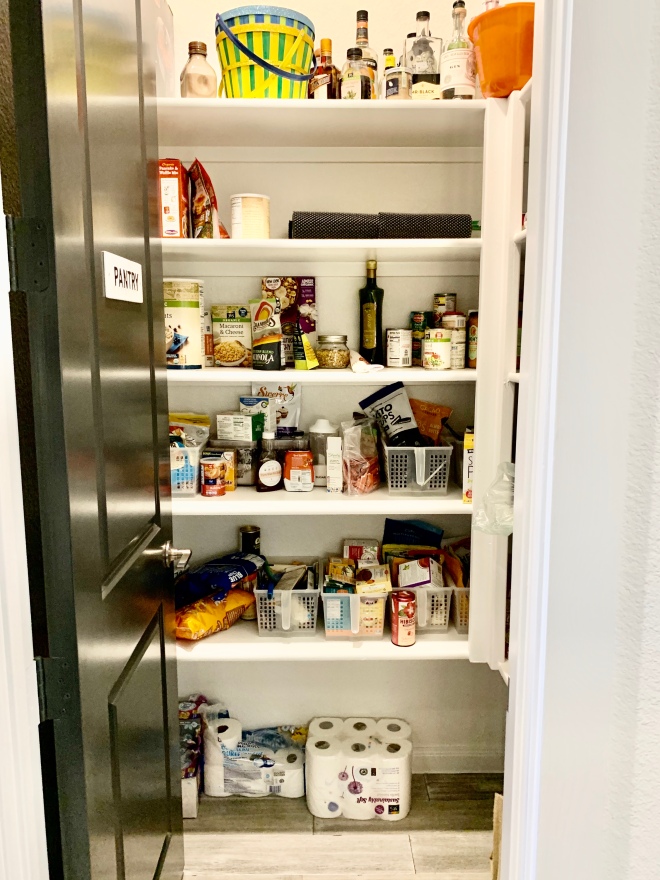
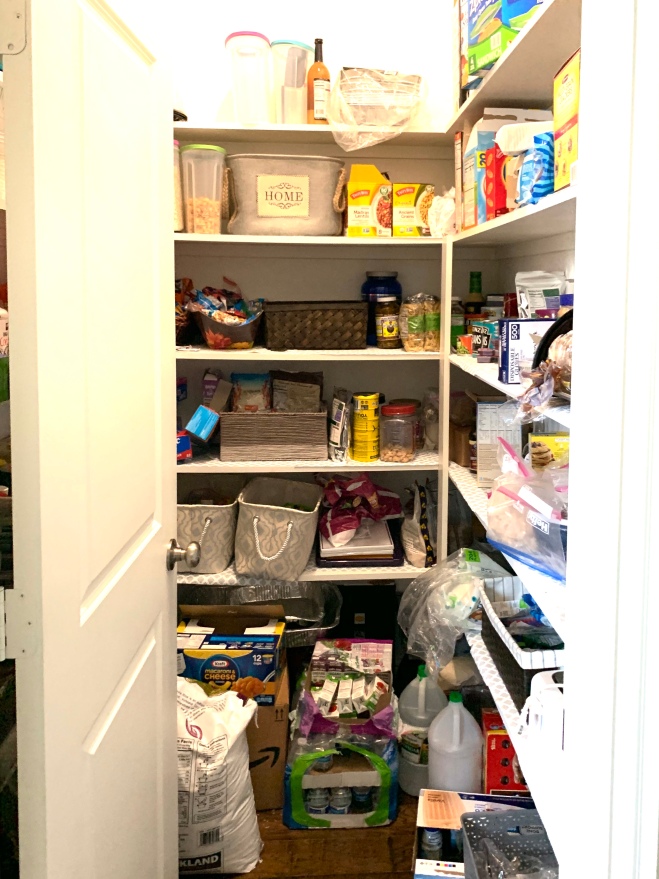
Before: Costco purchases left on the floor in boxes made everything hard to get to plus created a ton of visual clutter. Again, there is no rhyme or reason as to where things go. This creates chaos and frustration when trying to find what you know you have.
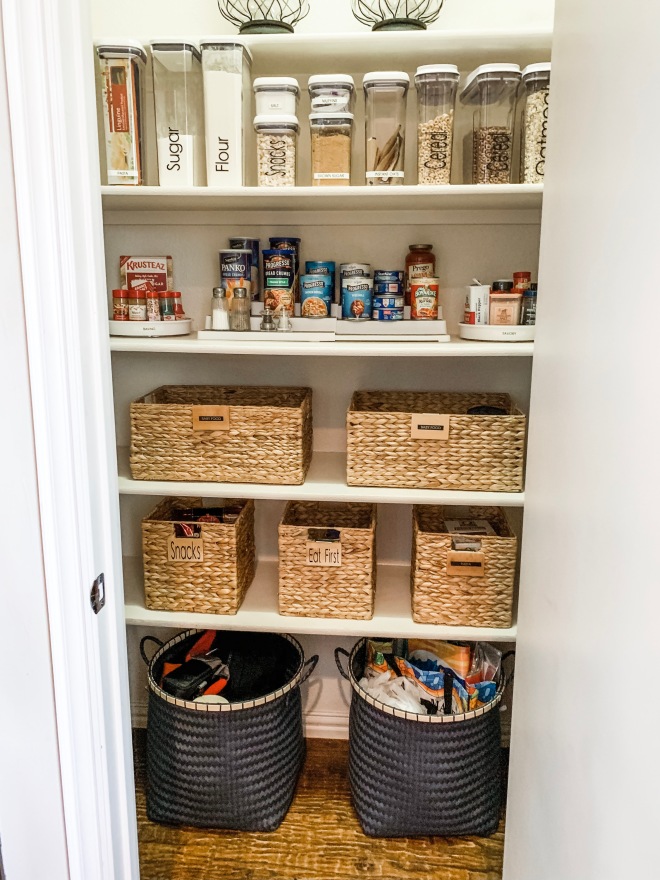
After: I took everything out of the big Costco packages and put the contents into bins my client already had (similar ones here). This makes it easy to grab and go. When the bin gets low you know it’s time to buy more. I also used my favorite affordable white bins and labels (click here to order) to clearly distinguish where everything is. What’s for dinner? Let’s go look in the dinner bin and see what we have! Kids want to pack a lunch? The lunch bin has everything they need, just bring the bin to the counter, pack their lunch, and off to school they go. So easy. Want a snack? Grab the eat first bin and find all the opened snacks. Once again, I used large lazy susan’s in all the corners to hold jars and bottles, and cereal containers stored all together make it visually pleasing.
You too can have an organized pantry!
Do you see a formula here? Zones, bins, labels, and floor baskets are my go to when I am organizing any pantry. You can do it too by following these easy steps:
Take everything out: sort everything into like piles and check expiration dates.
Plan the layout of your pantry for what works best for your family. It’s not one size fits all. See my pantry here (click “My Pantry” under my saved stories).
Live in the DFW area? I can help you! I”m an email away. Don’t live in the Dallas area, that’s ok! I offer virtual organizing sessions via FaceTime. It’s really fun. We facetime for 45 minutes and talk about your space. I then send you a detailed to do list complete with links for products.
A few weeks ago I was asked to be part of a fun collaboration with a new client. The client was surprising his wife with an amazing anniversary gift…a new custom master closet from The Container Store. He pulled off the surprise by scheduling a trip for he and his wife during the installation period. So fun right?!
Step 1: Design your dream master closet!
He started by visiting our local Container Store to set up a meeting with a custom master closet design specialist. Anna at the Fairview Container Store was the designer on this project. She met with the client several times in the store and at their home to discuss the wants and desires of the new custom master closet.
TCS designers will take the dimensions of your existing master closet, (or any closet in your home) and design the space of your dreams, complete with 3D pictures to get a real feel for the new space. The custom master closet designer will also make a trip to your home to measure again, and discuss your master closet desires in depth.
Once that process is done, the measurements get sent off for production. Depending on the size of the job, installation will begin in a matter of weeks.
Step 2: Where do I fit in?
Normally, I would come in after the custom master closet is finished, but in this instance, the client needed extra help during the install process to make sure it was all finished by the time they returned from their trip. We had four days to complete the entire process.
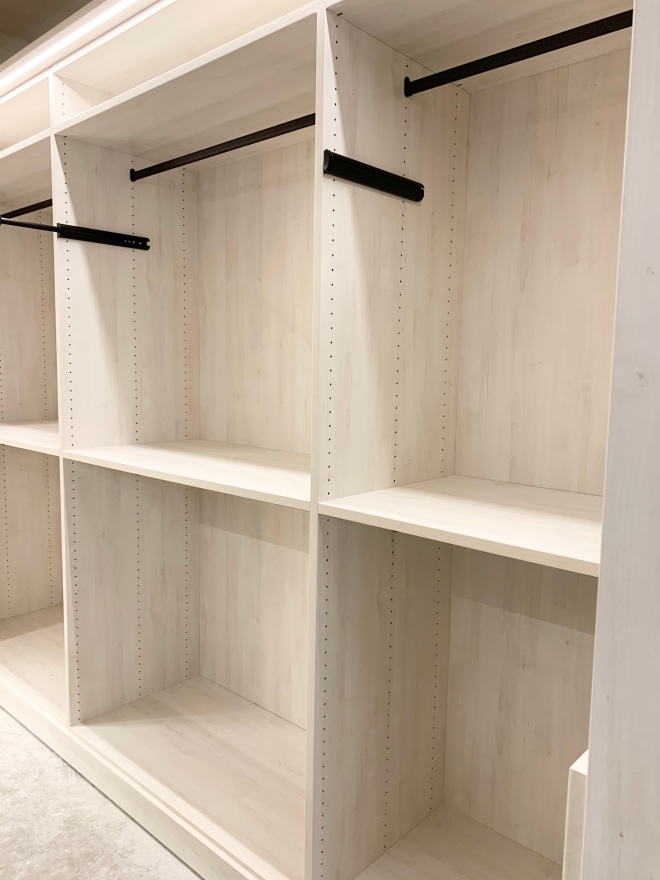
We arrived at their home minutes after they left for the airport and immediately got to work. We emptied the entire closet so the demo team could get busy. In a matter of hours, the master closet demolition was done.
The existing master closet during the emptying process.
The master closet after demo.
Next, the electricians got to work wiring the lighting for the new custom master closet. The client chose special lighting all around the closet with extra lights on the shoe tower. While they were busy doing all that, we were changing out hangers, sorting clothes into like piles and shopping for organizing products to fit the space.
The next day the closet installers got to work, it was really fun to see the process unfold.
During the master closet installation process.
Four days later ….the results were astonishing….we made the deadline with hours to spare….the only thing left to do is to lay the carpet and do some touch up paint.
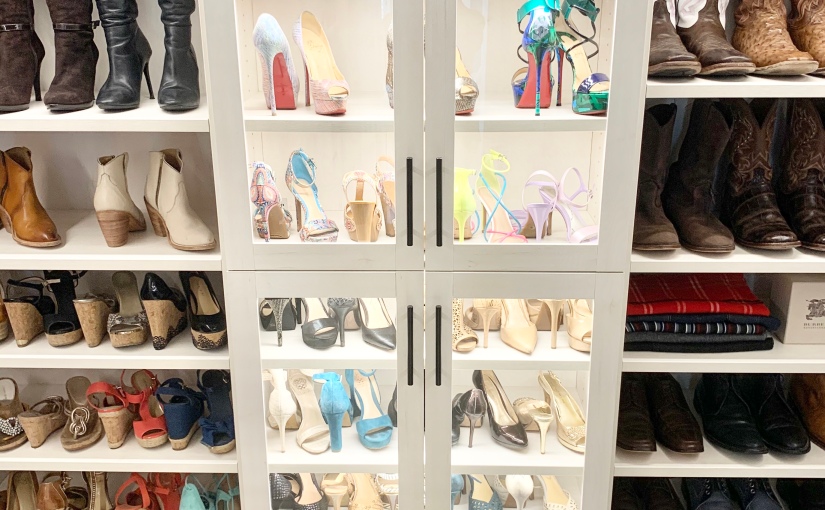
Here are some before and after pictures ….they say it best….
Can you believe the transformation? Before, no rhyme or reason to where the clothes and shoes were stored… after, a beautifully categorized space. Shoes with shoes, suits with suits… like with like items now have their own special place to live in this custom master closet by The Container Store.
Want to see more behind the scenes from this project? Visit my InstaGram bio and hit “TCS Closet” in my saved stories. Want to shop this closet? Find all the links to the products we used below.
I’ve always loved having an organized fridge. Let me tell you how I organize my fridge, saving time and money.
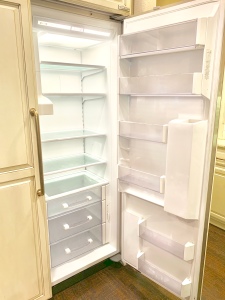
Step 1. Clean.
The first thing I do when organizing my fridge is empty it all out. This is the best time to clean it and sort through all your leftovers and condiments. I usually do it when the fridge is running low of food.
Then, I like to wash it down with warm water and vinegar. Smells clean and fresh.
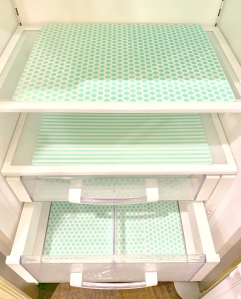
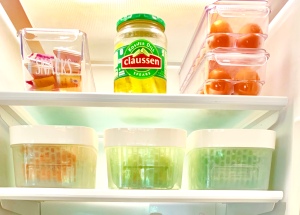
Step 2. Line the fridge.
Step two of organizing my fridge is to insert new Fridgecoasters. They come in so many pretty colors. This time I chose the mint. They are like coasters for your fridge, absorbing spills and keeping your bins and shelves easy to clean. When you order them they send enough to line your fridge twice! I change mine out once a quarter unless there is a spill. They are also biodegradable and can be added to your compost or recycle bin when you are done with them.
Step 3. Create zones.
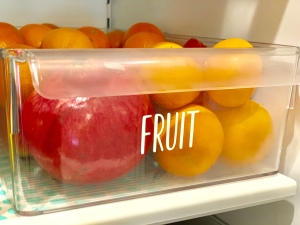
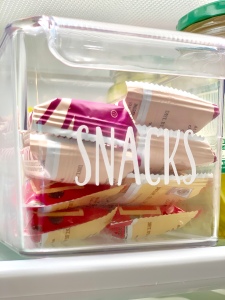
I love creating zones when I organize my fridge, and I do it by adding these fridge bins! I have them labeled to make it easier for my family to find all the like items together. It also helps when my family puts away groceries, they know where everything goes. I have one for fruit, lunch, and snacks.
Use bins to contain like with like.Labels make it easy to find what you want.Create a lunch bin with all your favorites in one place.
I love organizing my fridge this way. When I want lunch (my favorite is a veggie and hummus sandwich) I just grab my lunch bin and take it to the counter. The same goes when packing lunches. You can grab all the bins, bring them to the counter and everyone can make their own lunches. When you organize like with like, you know exactly how much you have. Makes less waste too, as nothing gets lost in the back of the fridge.
Step 4. Decant.
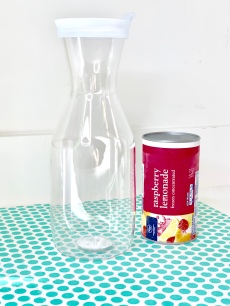
Just like with snacks in my pantry, I like to decant my liquids too. These carafes make it easy to see exactly how much milk and OJ is left. I don’t have to worry about expiration dates as we always run out before they expire.
The other product I love to use are these wine stackers. They are perfect for keeping white wine cold or stacking my hubby’s favorite lemonade. The bottles are too tall to stand up so these stackers help a ton! Use that vertical space.
Decant liquids.
I also keep frozen drinks in my freezer for company or parties. I like to have drinks ready, all I have to do is take out a frozen treat and make it in this carafe. Drinks look prettier when served in clear carafes don’t you think?
Keep frozen food on hand.
Step 5. Food Prep
Last but not least, I prep food for the week. I love using these egg trays. I keep one dozen hard boiled eggs (perfect for a quick breakfast, in salads, egg salad sandwiches, etc) and one dozen raw eggs for baking or scrambled eggs.
Make ahead food.
I also wash and prep all our veggies! These Oxo Green Saver containers help keep my fruits and veggies lasting longer. They come with a carbon filter which absorbs ethylene gas, keeping my produce from turning bad. I love the strainer that is included as well. I keep grapes in one of them and just wash as I eat them.
Having an organized fridge saves you time and money. Time is valuable and having food prepped and ready to go each week will cut down your stress, I promise. Prepping healthy food to eat eliminates those last minute decisions to run through the drive through. Time and money saved!
Organizing your fridge is as easy as this!
Are you in the DFW area? Do you need help organizing your fridge or other areas of your home? I’m an email away. And did you know I offer virtual organizing? I FaceTime with you and help answer all your questions during our call, then send you a detailed to do list and a follow up email in two weeks. Click here to schedule. I promise it’s fun!
I love organizing pantries so much because I’ve always felt that the kitchen is the heart of the home. It’s my happy place, and I want to make it yours too! We spend so much time in our kitchens through out the day that we need to make it a priority! You should love being in your space. I can help you make it pretty as well as functional.
Clear, Air Tight Containers
I look back fondly, to the years when my kids were little, of cooking and creating good meals for my family. I’ve always loved cooking for large groups, after all I am the oldest of seven, I can do it with my eyes shut. Like my Grandma, feeding people is my love language. So naturally for me, creating a functional yet pretty space in any pantry is a must.
Create Zones
How I organize a pantry.
If you follow me on instagram you know the drill by now. Take it all out. By taking everything out of the space, you will touch and see it all, forcing you to decide if you want it, need it, and/or use it.
Before….you must take it all out!
Next step is sorting. Sort like with like. Check expiration dates during this process. I put all the baking together, all the lunch items together, all the snacks together and so on. If I had a quarter for every time I heard “how did I end up with five of these?” I’d be rich.
Oxo Brand Pop Top Containers
Now create Zones. Here is how I zone my pantries: Breakfast, lunch, dinner, snacks, eat first (snacks), baking, paper goods, cleaning supplies (if applicable). I use the top shelf for large items that aren’t used very often.
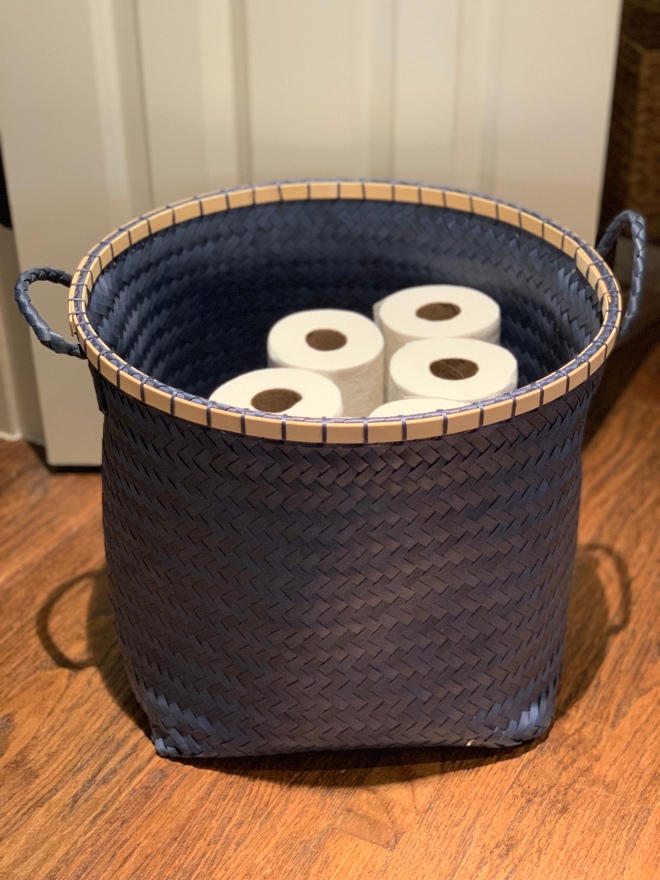
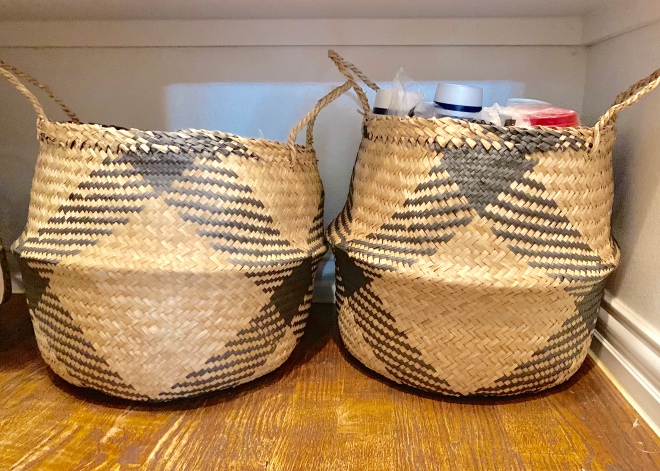
Lastly, use floor baskets help hide clutter. I use big floor baskets for paper and plastic sacks, lunch boxes, cleaning supplies, paper goods, and Costco snacks.
Hide the clutter with large floor baskets.
Target Basket
Belly baskets hold a ton!
Now, it’s time to enjoy!
That’s it! That’s my pantry formula!
I’d love to help you organize your pantry too! Did you know I do virtual organizing? It’s so fun and easy. We FaceTime for forty five minutes and then I send you a detailed to do list and links to all the products. It’s that easy. Or if you live in the DFW area, I’ll drive straight to your house. I also travel! Send me a plane ticket and I’m there! We will have fun, I promise.